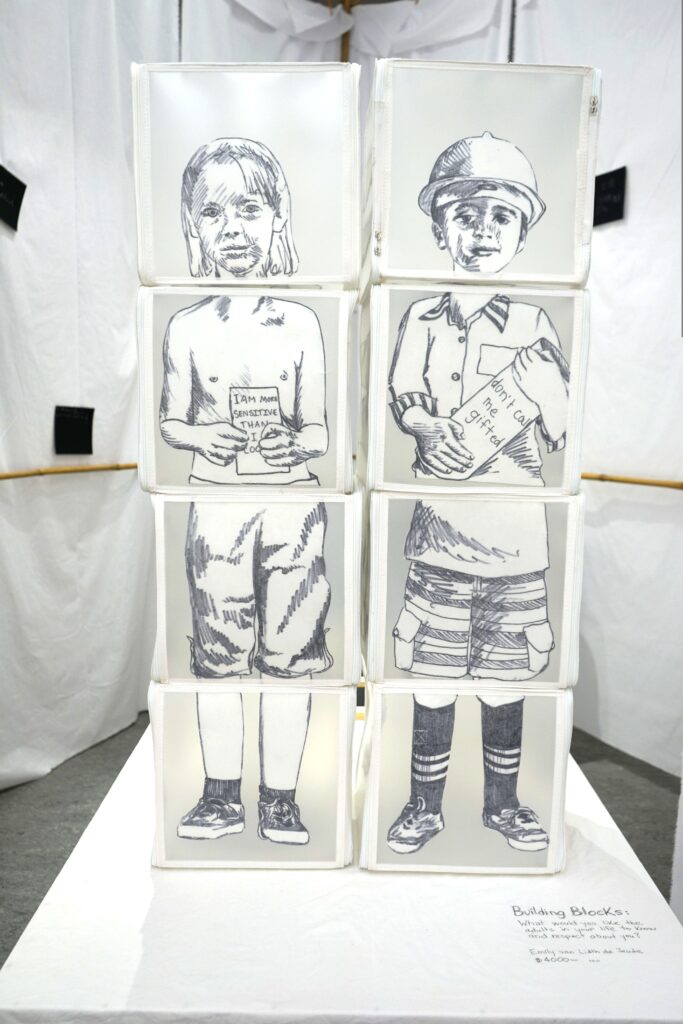
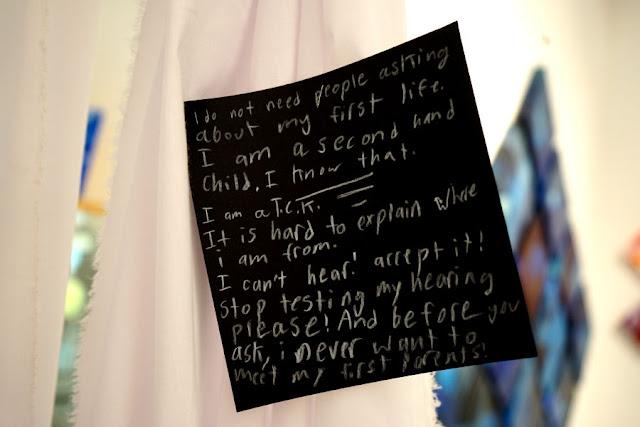
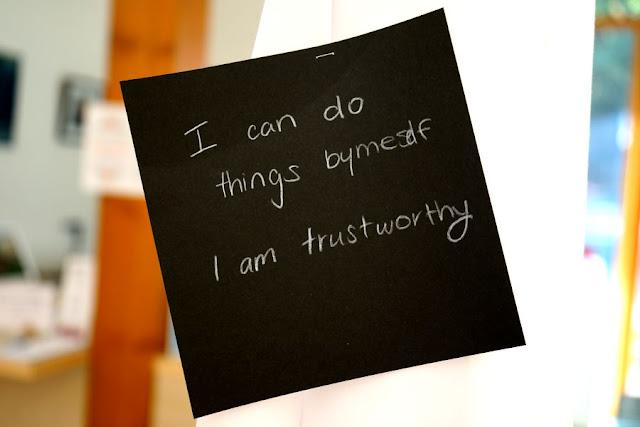
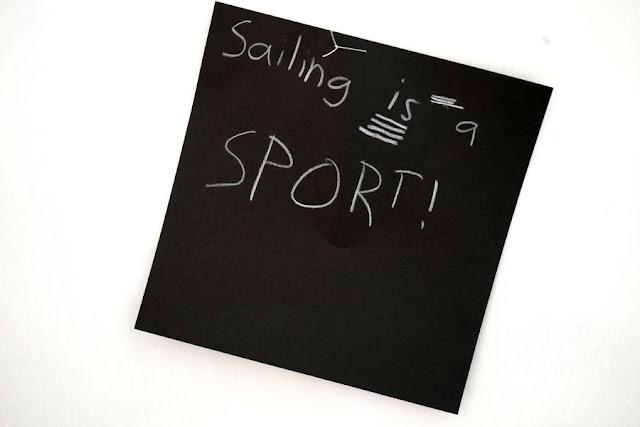
My 2019 exhibit included, as its central installation, this piece about children's rights. It's made of plastic clothing storage boxes, which I covered in portraits of children, holding signs that state their various answers to the question, What would you like the adults in your life to know and respect about you?
The children who contributed the answers for this sculpture range in age from 5 to 17, and the sculpture is interactive. Visitors to the installation were encouraged to put on white gloves and play with the cubes, rearranging again and again to make a vast assortment of different children.
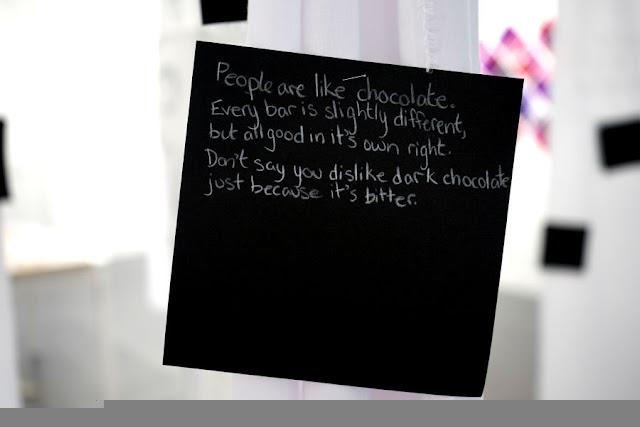
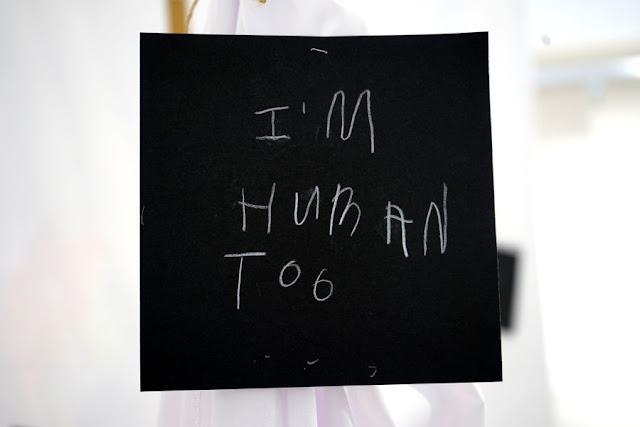
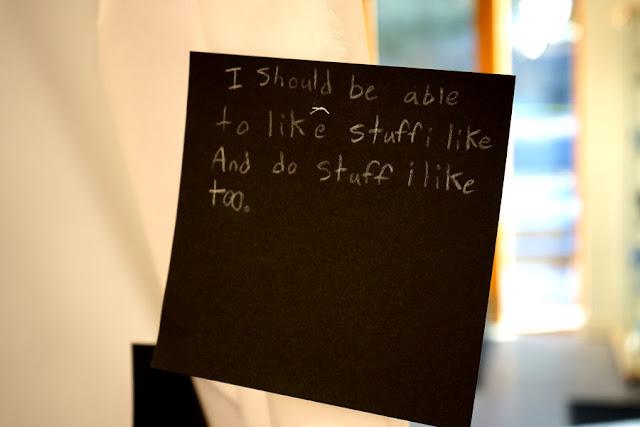
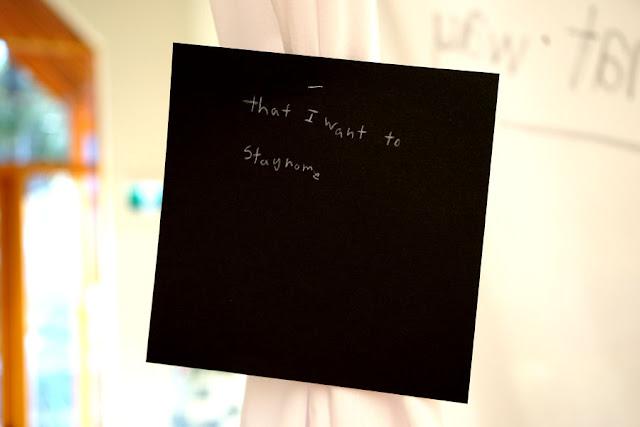
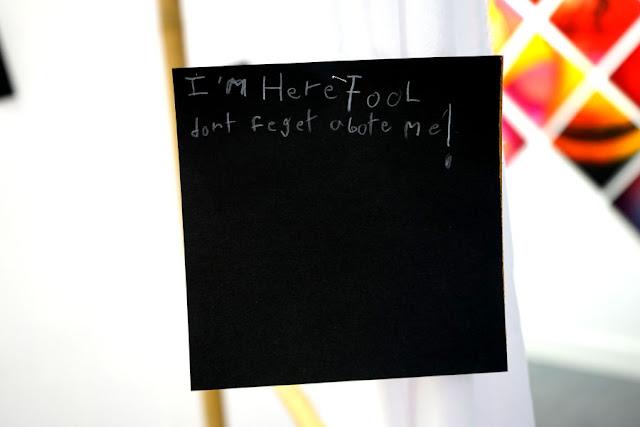
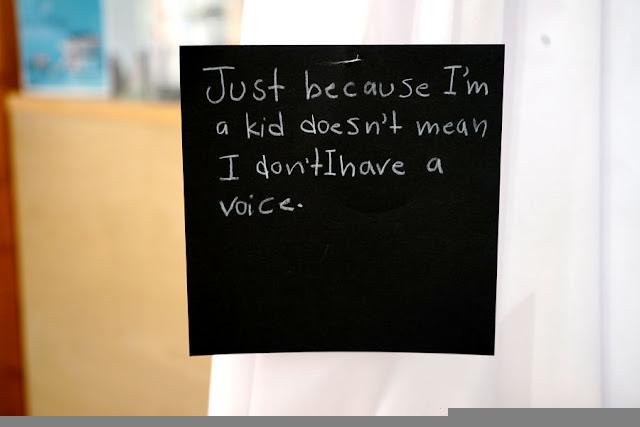
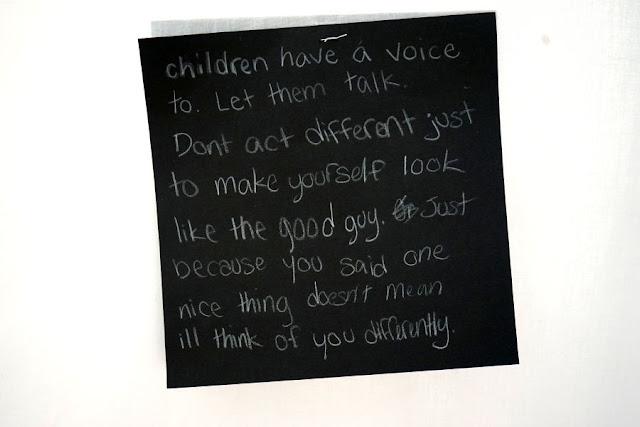
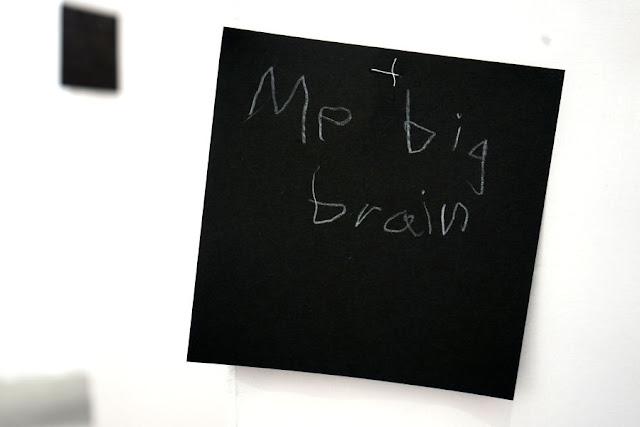
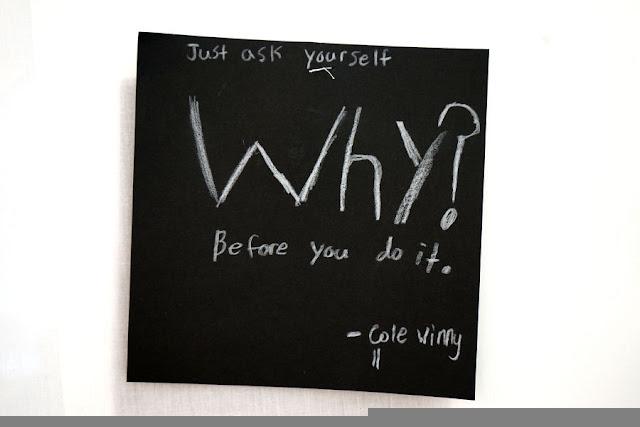
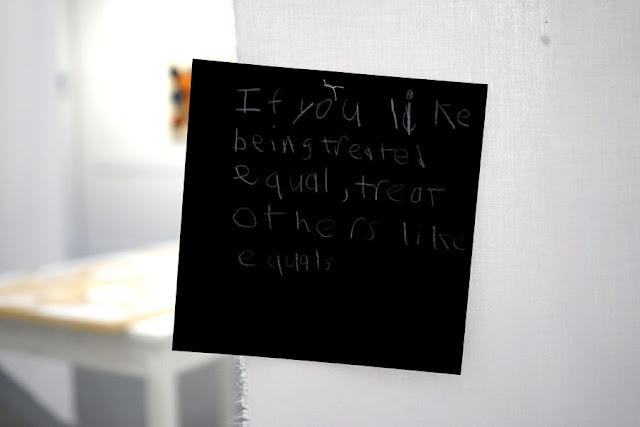
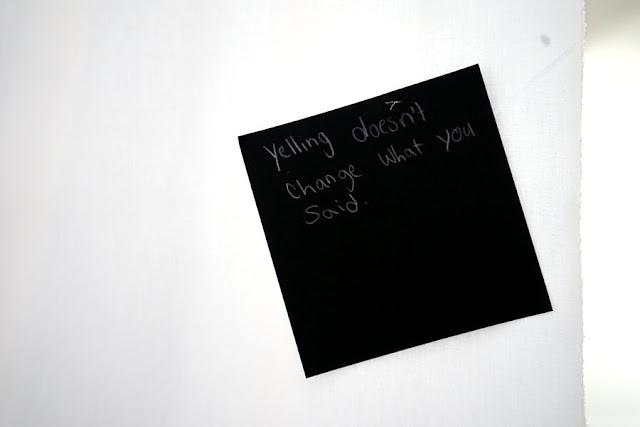
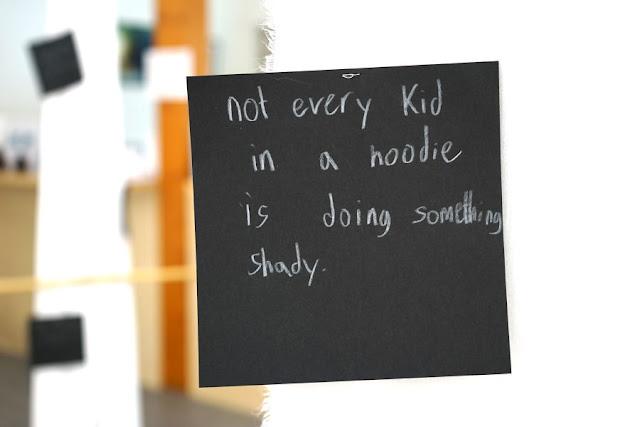
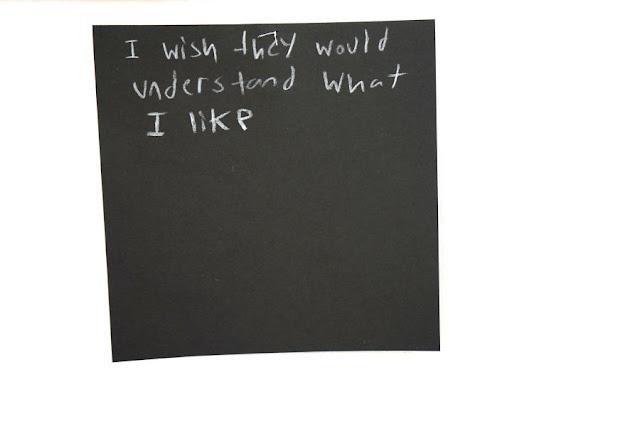
The installation included a small tray of black paper, where young visitors could write their own answers to the question. I hung these answers around the installation as they appeared.
These are the voices of our children – mostly anonymous children, and therefore everychild. These are the things that all children need us to know. They need us to shed our busy-ness, our righteousness and our preoccupations and hear their voices. And their voices keep coming. Let's be good listeners.
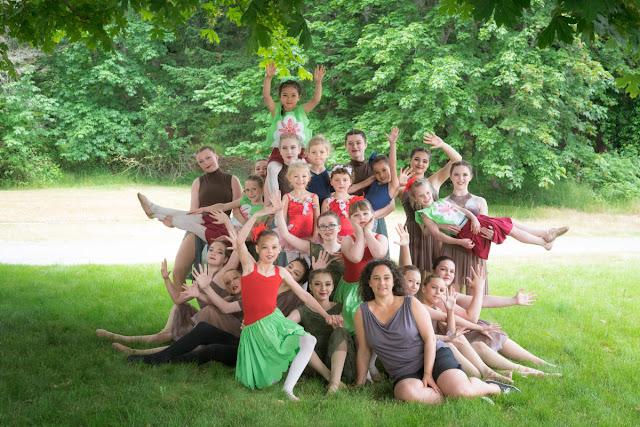
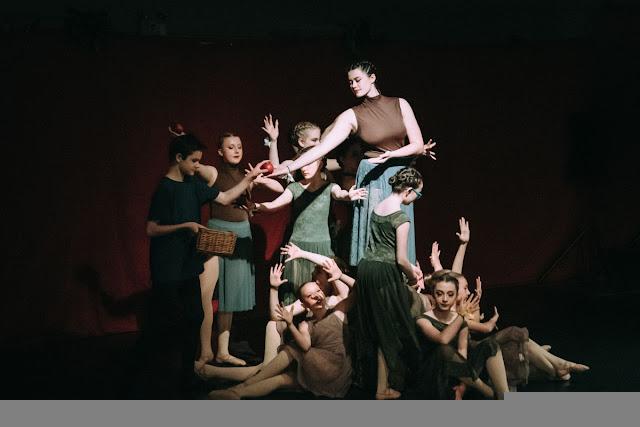
Mara Brenner with students of Gabriola Dance, 2019. Photo by Inspired Spirits Photography.
When I was 26, bewildered and a bit in shock with the reality of new motherhood, I took my baby to our local Family Place, and sat around the edges of the activity, watching. Whining lines of Suzanne Vega ran through my head: "in the outskirts, and in the fringes, on the edge and off the avenue"… as my baby nursed his way through the stress of a new situation. Out of the fray of mothers and toddlers and snack foods and plastic dishes came the most welcoming smile. This woman actually held out her arm to me, beckoning me to join the group. And Mara became my friend.
Years later, as we sat around her trailer home together, watching our kids play and leap from the furniture, I complained about my back issues, and Mara deftly used the opportunity to attempt to convince me to take the adults' ballet class that she taught in the evenings. I told her 'no way'. I explained that ballet left me behind when I was nine and had a pot belly and knees that didn't straighten all the way. She convinced me anyway, and next term I cautiously and inelegantly stepped into her class.
Mara doesn't just teach ballet. She's an accredited Pilates instructor, and a passionate life-long-learner of human anatomy and movement. She looked at me while I attempted the ballet moves and explained exactly what my muscles and bones were doing and how I could optimize for my personal development. When she didn't have an answer, she went away and researched or thought about it until she figured it out (yes – that's the definition of being a life-long-learner, and an expert!) She sees people not only as moving, learning bodies, but as humans with struggles and opportunities. I soon became one of Mara's 'Tequilarinas' – the group of adults who danced until 9pm and then went for a tequila at the pub, together. After a year, my back was healed. I started wearing superhero costumes to ballet.
Through her friendship, clear strong vision, and unflinching determination, Mara gave me more confidence and opportunity than any other teacher I've had.
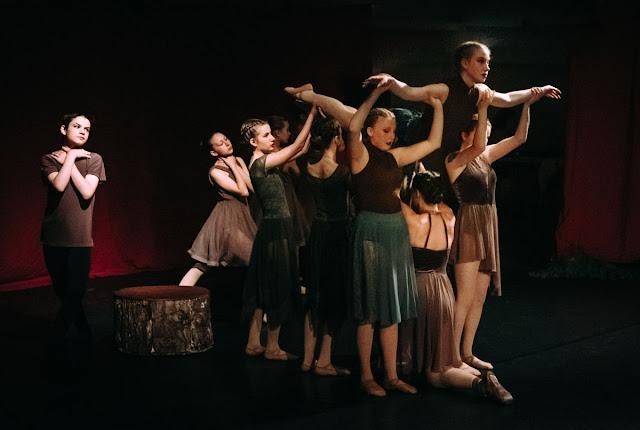
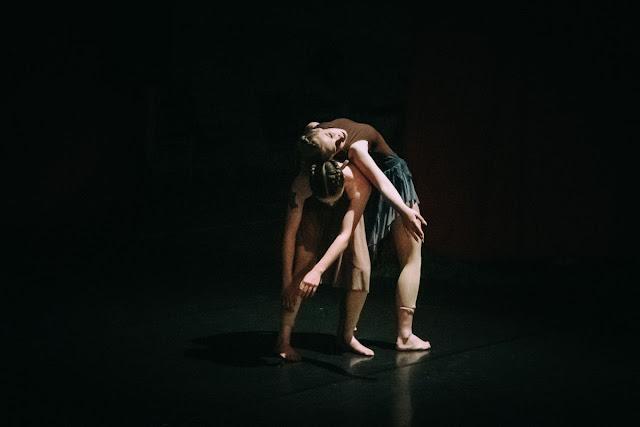
Gabriola Dance year end showcase, 2019: The Giving Tree. Photo by Inspired Spirits Photography.
Mara Brenner taught our island's children and adults ballet, and also used her company MaraGold Productions to bring world class artists to perform not only on our small island, but at various Canadian venues. She worked her dancing feet off one hundred percent of the time, not just giving to her community, but building it. She exemplified a kind of character strength and courage that's hard to maintain, but essential in a thriving community. Eventually her community turned its back on Mara and her family.
Our land use bylaw only allows trailer-living for a brief period of time while landowners are building a permanent dwelling. As you can imagine, building a home on the wages of a ballet teacher and a glazier, while also raising two young children, takes longer than it otherwise might. Mara and her partner, Stu, lived in a trailer on land they owned, while slowly building their permanent home. At the point they were forced to leave, they had only built the foundation. Theirs was almost an idealist story of dreamy island living, until our snooty bylaws pushed them out.
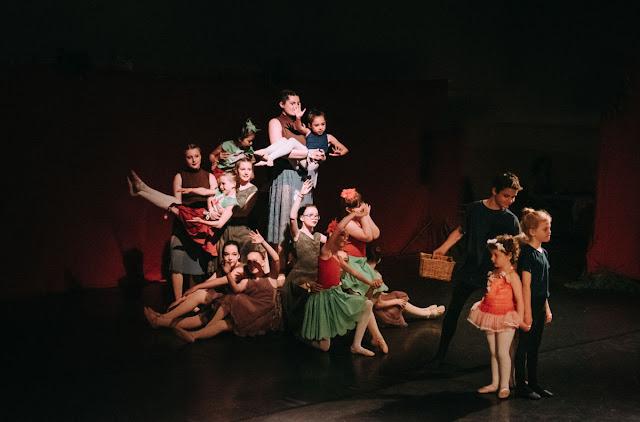
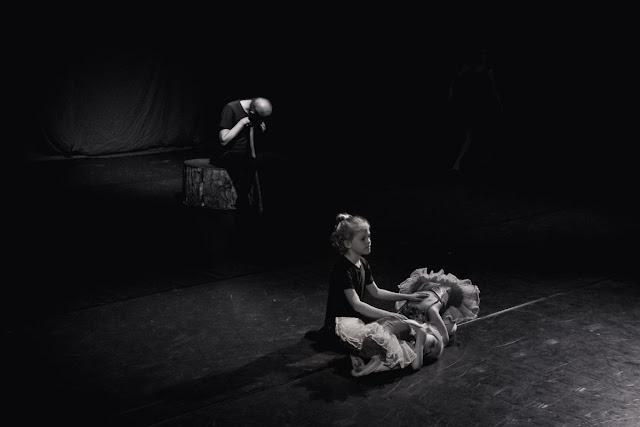
Gabriola Dance year end showcase, 2019: The Giving Tree. Photo by Inspired Spirits Photography.
So they left! Mara and her family found their new home on Gabriola Island, and quickly turned the small outbuilding into a dance studio. Around the same time she was gifted her own ballet teacher's extensive collection of ballet school costumes, and she threw all her extensive skill and passion into Gabriola Dance. Last weekend I went to see her year-end showcase, and I was moved to write this article.
Gabriola Dance year end showcase, 2019: The Giving Tree. Photo by Inspired Spirits Photography.
Finally with a permanent roof over her head on Gabriola, Mara pulled everything out of her heart and poured it into ten years of parenting and teaching in her new community. This 10th showcase felt to me like watching my friend stitch up all her passions and skills into one beautiful, powerful package. It was in many ways her gift to the world.
Gabriola Dance year end showcase, 2019: The Giving Tree. Photo by Inspired Spirits Photography.
I think we all hope we can make a difference in the world – at least leave it a slightly better place than we found it. These days many of us are just hoping we save enough of the world that our children will grow old before it's gone. So Mara developed a dance performance of Shel Silverstein's 'The Giving Tree'. The piece brings together students of many diverse ages and training levels. It's profound and moving, but Mara didn't leave it at that. Working on this project brought up a great deal of conversation among students about climate change, and it became clear that she needed to deal with the prevalent angst and anxiety that today's children harbour around this topic. So she had all the conversations with them, and at the end of the dance showcase, she hosted a talk back with biologist Melanie Mamoser and registered clinical counsellor Caitlin Kopperson, to discuss the affects of climate change on childhood anxiety. One of the most urgent questions, of course, is 'what can we do?', and although there's no clear answer to that, there were some good ideas, and the conversation at least left me feeling hopeful that people were talking about it, and that children's voices are being heard in this discussion.
Gabriola Dance year end showcase, 2019: The Giving Tree. Photo by Inspired Spirits Photography.
With The Giving Tree, Mara does something I hope we all manage to do in our lives: She orchestrates her many gifts into one grand oeuvre, showcasing not only the work of her students and other community members, but pulling them all together in a kind of hopeful community invocation. May we all have the courage to live our hearts' dreams and create a better world in doing so, each in our own ways, and all within community.
Gabriola Dance year end showcase, 2019: The Giving Tree. Photo by Inspired Spirits Photography.
When I was in high school there was a poster on the door of my art classroom that displayed the then-ubiquitous 3 R's (Reading, wRiting, and 'Rithmatic) along with a 4th: aRt. I think Mrs Sunday never knew how much that poster influenced my life. In grade twelve I spent nearly every lunch hour in the corner of the art room, using up her acrylic supply for finger-painting, and paint-squirting. To her enormous credit, she let me do it. I still do it, and I encourage everyone to do it – to get as messy and unexpectedly creative as possible with whatever supplies they're given.
I spend a lot of time on my other blog talking about explorative wilderness play, but many readers know I'm also an artist and art educator, so I am often asked about "real" art supplies, and what kinds of simple art projects are good for various situations. I feel like it's time I give a nice solid answer to that.
First, let me be clear: The best way to learn art is by exploration. Art is also a wonderful explorative activity for learning everything else. The Council of Ministers of Education, Canada (2012) states the following:
"The benefits of play are recognized by the scientific community. There is now evidence that neural pathways in children’s brains are influenced and advanced in their development through exploration, thinking skills, problem solving, and language expression that occur during play.
"Research also demonstrates that play-based learning leads to greater social, emotional, and academic success. Based on such evidence, ministers of education endorse a sustainable pedagogy for the future that does not separate play from learning but brings them together to promote creativity in future generations. In fact, play is considered to be so essential to healthy development that the United Nations has recognized it as a specific right for all children."
So all those wonderful prescriptive art projects where you know the outcome before you begin, and the process of creation means following instructions? Those awesome craft kits that come with the pictures of what it will look like when you're done? They're junk. Throw them away. Or at the very least, get rid of the packaging and present the included materials with no expectations or directions and let the kids do whatever they want with them. Yes little ones might eat the crayons. So make sure they're non-toxic. Older kids might also melt them to make candles or wax prints or just to see how cool the melted colours are when pouring them around. Awesome! All of these things are actually done by professional artists all the time, so it's not even a stretch of the imagination to see their value. In fact, a stretch of the imagination is exactly where the value is to be found – because that is where the learning is. When I apply for an art grant for my own artistic practice, it always includes funding for "research"… which in the art world means experimentation and playing with material, form, and method.
It's important to think about how the presentation of the materials influences the way we use them. My father used to own a toy store, and supplied the Waldorf school in North Vancouver with the wonderful beeswax block crayons they use. He always had a lot of blacks left over, because they don't use those in their program. How does a child's thought-process change if they are never presented with the option to colour with black? We can't know for sure, but I am positive there are some interesting associations, there. I give me children all the colours. But do I always present them in rainbow-gradient? No. And amazingly, the kids end up sorting them themselves, into a myriad of different patterns, either because the sorting itself is fun, or because it's useful for whatever they're doing with the crayons. This, too, is an important part of their learning. It's how they familiarize themselves with the materials they're using, and with the colours they're working with.
Now for some material suggestions. I'm going to go most often with the cheapest alternatives, because we live in a disastrously consumerist society, and none of us needs to be buying new materials when they're not essential. Even on a tight budget you can get a load of materials at huge stores, but you don't need to. Going with unexpected chance finds from the local thrift shop, recycling depot, or other people's refuse not only saves money but also opens all sorts of new avenues for experimentation and problem-solving that will teach your kids more than a pristine new package from a store will.
Art-making space: Whatever your circumstances, just make sure you provide a large area where mess-making is acceptable and clean-up is easy. A large table is great but if you don't have one, or don't have suitable chairs, a corner of washable floor can be great too. Outside, a sheet of plywood on the ground suffices. I've done this often. Cover the space with a heavy paper that can be used for mess-making, drawing, or notes, and replaced when necessary. You can also cover it with a heavy plastic table-cloth, but glues and acrylics will eventually make the plastic lumpy, so I still recommend the paper-cover on top to make cleanup easier.
But… don't keep art confined to this space. Take it to the kitchen. Bake cookies and cakes and decorate those; fill the sink with water and drip paints in or use the surface for oil-resist prints. Take art outside. Do tie-dyeing or papier mache there. Paint the lawn; paint your car or bicycle or front door. My uncle once gave his young children house paints and had them hand- and foot-print the front entry room. Decades later, their beautiful creative creation is still the welcome that guests first receive. Make everywhere art space.
An Easel: Not only does it give a new perspective to have your workspace upright, but dripping paint is wonderful, and should be encouraged. However, you don't have to go get an expensive easel. A stable propped board will do, as will an old sandwich board on a table. The best accessory for your easel, though, is a pair (or more) of large bulldog clips to hold paper in place.
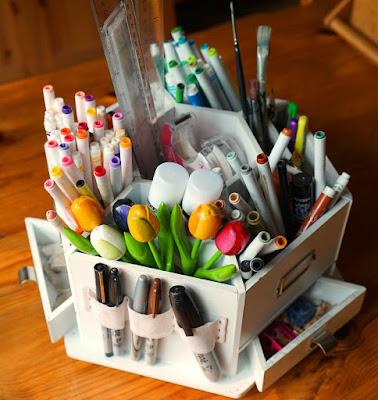
Storage: If you want to have a beautiful art corner, you still can, even if it's not colour-coordinated or tidy. A bunch of large bins and a very few smaller ones will do well, or similarly a chest of drawers. We do have a great art-storage carousel that has been in use in our house for many years, holding an assortment of whatever the currently-most-used supplies are. This makes a greater number of supplies more easily accessible to various people seated at a table, and a handy place to put them away quickly. But it's not essential. A bunch of materials rolling around the table can actually inspire new ideas.
Some kind of drying rack is a great idea. We never had space for one, but the end of our dining room table was usually used for drying. Still, if you have space, old oven racks or baking racks can be a great thing to have in your art area. A permanent set of wire-rack shelves is amazing.
Paper: It really doesn't matter what you have – just have some. Preferably lots. We commonly have whatever papers people have passed on to us, including old letterheads, those old perforated printer-papers, construction and manila papers, some old used sketchbooks that people threw away with 80% of their pages still unused, and various types of white and coloured printer papers. I also supply my kids with the seemingly endless supply of graph-paper which they love. No papers have specific intentions. It's OK with me if fancy sketchbook papers get used for note-taking or construction or torn-up little shreds of I-don't-know-what, or even crumpling into balls and called 'cat toys'. Getting the paper second-hand helps me let go of my own hang-ups about 'intended use' and 'value', which gives the kids a broader explorative environment, and greater learning opportunities.
Cardboard: You could go all out and have some gigantic boxes for construction experimentation (my kids have built cars, rocket-ships, stores and villages, and most recently, as teens, a vending machine which they took into public for entertainment). But at the very least you should have some old boxes or scraps around in case construction starts happening. I hope it does!
Cutting Devices: Good scissors, appropriately sized for the people using them. An exacto knife. Obviously not for young ones, but you might have one handy to help out with big cuts. And a serrated bread knife! This has been very helpful to us for cutting cardboard, especially. Also never underestimate the usefulness of a good hole-pucher, and things like skewers for poking holes in cardboard.
String, ribbon, and other tying materials: Especially for constructing with cardboard, but also comes in handy for making books and all manner of other things. You never know when this will be just the thing you need in the moment!
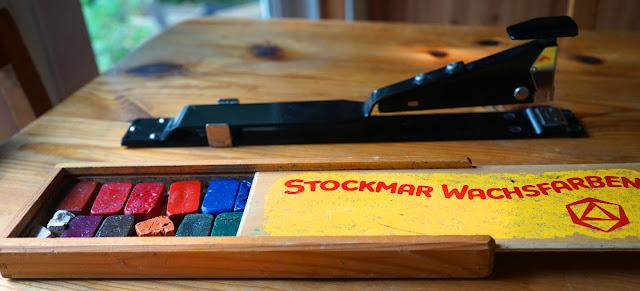
If you're going to get a stapler, get a fabulous one like this that can reach into very big projects. And take a look at this Stockmar box from my childhood. The box has been replenished piece by piece over the years, and the crayons have been chewed and used by multiple generations.
Mark-Making: It's important not to narrow our kids' ideas of what constitutes a proper mark. So much is lost to a narrow mind! So provide lots of different options, and let the kids mix them up. You might want to keep some expensive felt-pens out of the acrylics, just to keep them in working condition, but experimental mixing of media in general is a highly educational activity, so do it! You don't need all of these but at least have many.
chisel-tipped pens – for older kids sharpies are awesome.
a great assortment of colourful felt-pens. Those cute stubby pens are a huge waste of plastic, though, since they run out frustratingly quickly and have to be thrown away. Tip: Store felt and ink pens tip-down, which means they last longer before drying out.
pencil crayons (as they are worn down they make many different types of marks)
wax crayons. Lots – and be prepared to see them very, very broken.
those Stockmar beeswax block crayons I mentioned earlier.
paint pucks that fit into a plastic tray – when you don't have time to get out the bottled paints, or just for watery experimentation, these are a wonderful thing to have available.
bottles of tempera or acrylic paints that you can squirt out small amounts of for open-ended free painting (tempera is great for younger kids who might ingest it, but acrylic is great for the ability to paint on many surfaces).
brushes! The best in my experience are natural stiff-bristle brushes, flat or chisel-shaped, because they give more opportunity for a variety of marks than round ones do, but others can be fun too.
pencils, erasers, and fine black markers.
something smudgy like chalk or oil pastels. Sidewalk chalk can be used inside and chalkboard chalk can be used outside.
Glue sticks: Glue gets two sections because you need both. We always have a few glue sticks around, as they're the best way to stick papers together without soaking or wrinkling them. I recommend acid-free strong-hold glue-sticks. Don't bother with those silly school-glue types. They often don't hold.
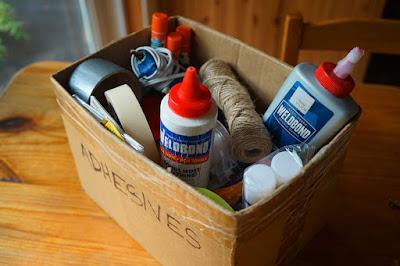
White glue: While basic white glue will work for many applications, such as stiffening fabrics, gluing together cardboards, fabrics and layers of paper, we keep a bottle of Weldbond universal adhesive around because it glues almost everything! That's a great advantage when you're mixing up sometimes unexpected materials.
Fabric scraps and found materials: Without getting into the wonderful worlds of sewing and yarn arts, fabric itself is indispensable as an explorative material. With a bin of such materials for free creativity and exploration, you can create costumes, forts, decorations for those cardboard constructions, head-dresses, jewelry, dolls, doll-clothes, and really an endless list of delights. Have a bin of scrap fabric! And to this add found materials like plastic, corks, sticks, wires, etc. You never know what random things will be fabulous. Discarded CD's and cutlery for example. You just never know.
Something to squish and build with: A great block of clay and a big clay board to work on is awesome. That would be my favourite, although to be honest I didn't often have it on hand for my kids. We mostly used natural clay from the creek outside, and mud. Of course there are plenty of polymer clays available and while they're fun for building with, I don't personally like the environmental burden they bear (wanton use of plastics that end up in the garbage). I'm not really suggesting slime, either, because while slime-making and playing is a fine explorative activity, and fun, I think we get so much more mileage out of materials that stay put when shaped. A biodegradable glue mixed with sawdust or ground/shredded newspaper, by the way, is a pretty cool modelling material. So is salt dough, and gingerbread, if you want to eat your creation. One brand name product my kids did love and use for a long time was Stockmar modelling beeswax (no I'm not paid by Stockmar; they just make a few really fabulous products!).
*** So you see, the main thing is to have a fabulously free space and some stuff to play with there. Get messy. Play with the kids (or teens or adults!). They will learn a huge amount from watching what you do, so make sure you're exploring and have no idea what your outcome will be. This will help them learn to do the same, and together you'll make wonderful discoveries.
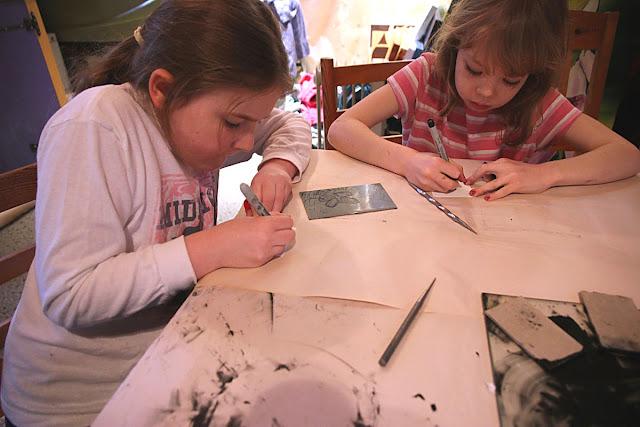
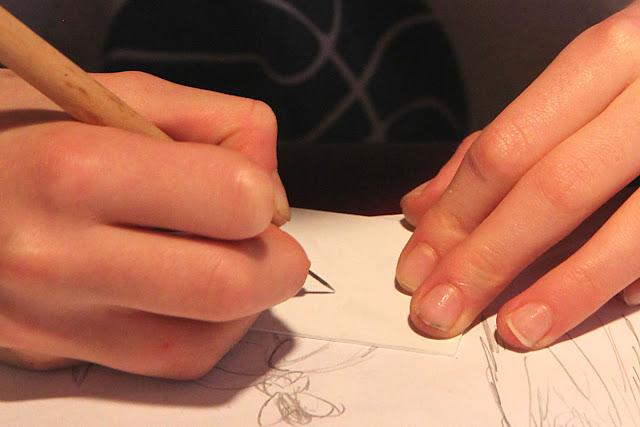
I am a printmaker. It's one of the things I'm proud to say about myself. Printmaking is not just a craft, but a way of looking at the world. And one of my life's greatest delights is when I can share this craft and lens with others. Today I was fortunate to have the opportunity to share it with a bunch of kids.
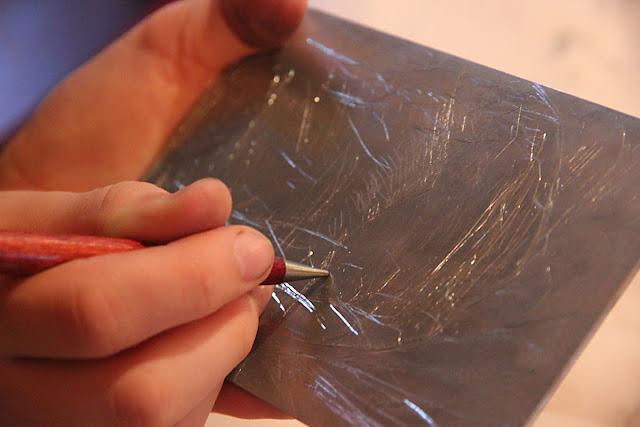
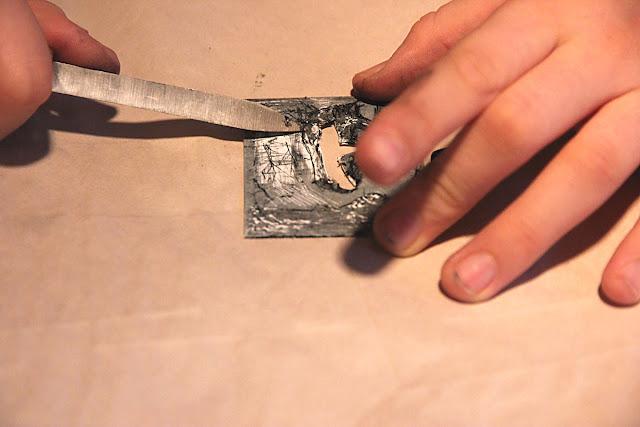
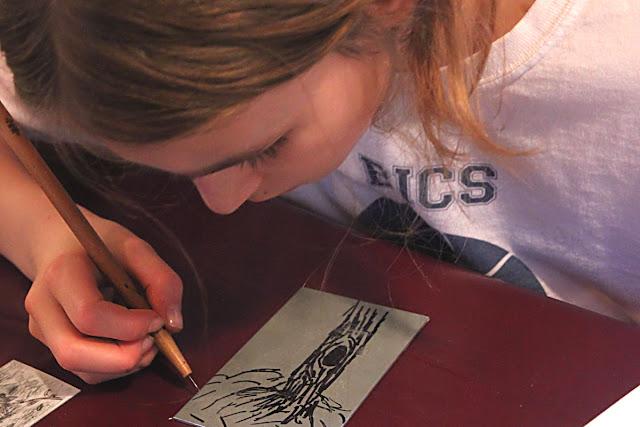
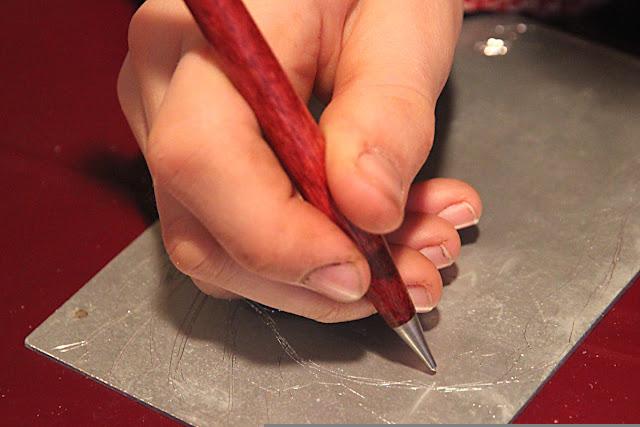
How to make a simple dry-point intaglio print:
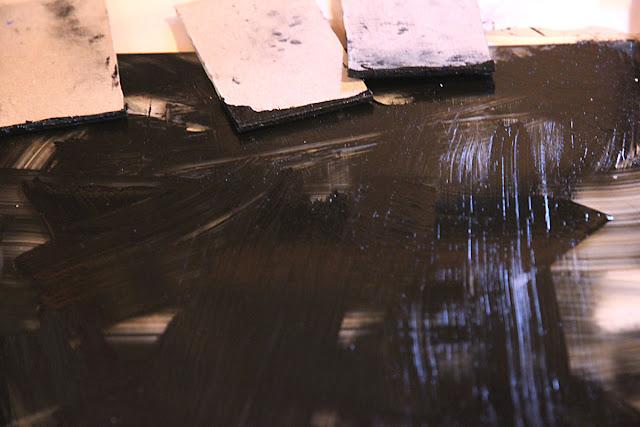
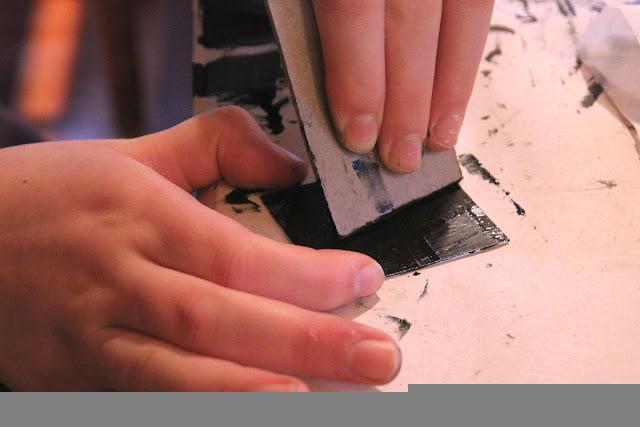
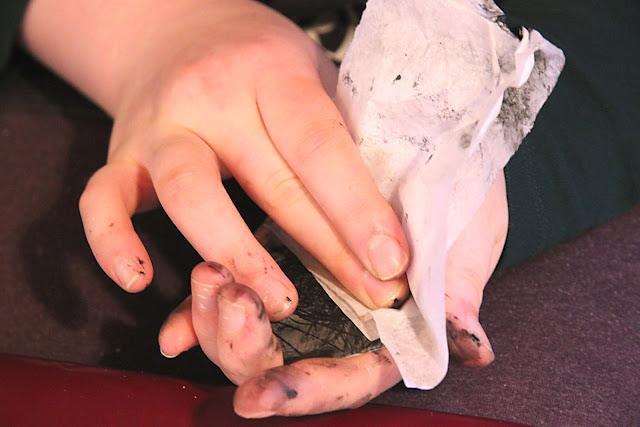
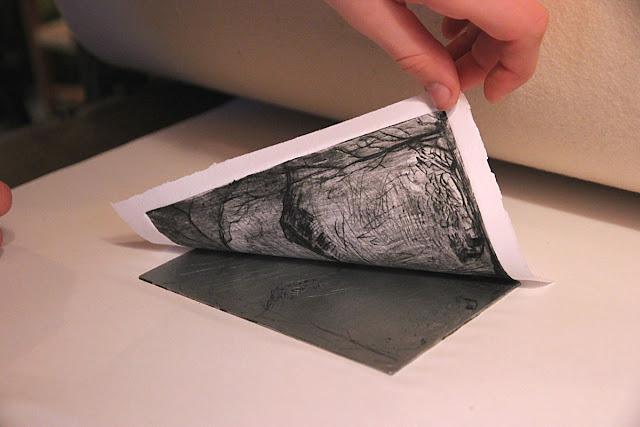
First scrape down and round off the edges of your plate. Then plan your work with a permanent marker on the plate.Then use an etching scribe to scratch the design into the plate. We used acrylic plates first.Then we used zinc for the second round of prints. The scribe cuts a groove into the surface that has a burr on one side (and sometimes on both sides). This groove will hold the ink during printing.When the plate is run through the press, the wet paper is pressed into all the grooves, and around the plate, giving a noticeable relief to the print. We can take advantage of this by carving the plate to form an interesting 3-D effect when it's printed.When using only lines for depth of colour, texture, and form, it can take a very long time to get the whole plate finished.Some scribes are easier to create deeper lines with, but in the end inking is as much or perhaps even more important to the outcome of the print than the lines themselves.Ahhh… ink. Thick and sticky, it needs to be mixed well on the glass plate using little cardboard paddles. I don't have a photo of the paper, but generally when we start inking a small plate is a good time to start soaking the thick, fibrous intaglio paper. This ensures that the pulp of the paper will be movable and will push well into all the crannies of the plate.Then the ink is wiped onto and rubbed into the etching plates.Using a smooth paper, we then have to wipe all extraneous ink off the plate! Technically, all the lines (grooves) should hold the ink while it wipes relatively cleanly from the smooth upper surface. However, the wiping can be tweaked in many different ways to allow for a lot of rich moody tones and layers of depth.Finally, the wiped plate is laid on the press bed, hands washed (for the umpteenth time in this process!), the wet paper laid carefully over the plate, and then a sheet of newsprint and three layers of wool felt. And then we slowly and steadily run it through the tightly-wound press.And this is what it's all for! That moment when we peel back the paper and discover what we've created!! No two prints are entirely alike, and every time we peel back the paper it feels a bit like a gift.
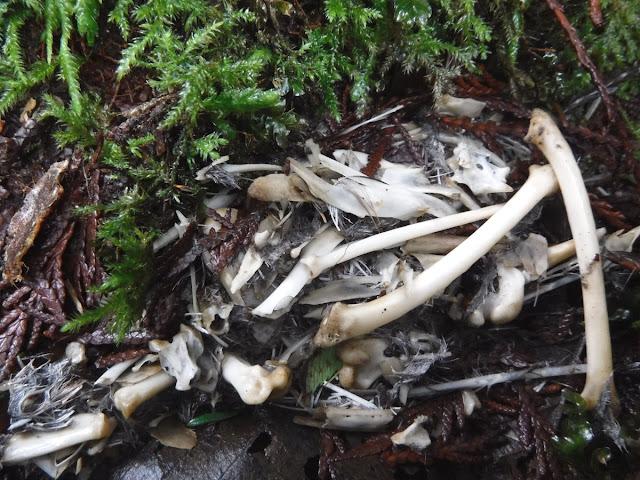
Between 2-hour-long sessions of intaglio practice, we went out for a very wet rainforest picnic, and to see if we could find some nature-made prints. We found our own footprints, first, then the print left by lichen that has fallen off a tree. We found the hole in the ground left by an uprooted tree, and even an owl pellet! We decided it qualified because, like all prints, it's a mark left by something departed – an impression of the past and a clue about past events.
Owl Pellet!
Prints often have a feeling of melancholy, because of the inherent absence or loss involved in their making. We breathed on the studio windows and made prints of our faces in the steam. They were gone by the end of the day. It's good to think about prints; about the impression we leave upon the world and the impact we have. Prints speak also about memory. They remind us that the impression is not always the same as the original. And like memory, every retelling takes on a different character; a different reality. Prints remind us of our importance in the world, of the many different and multifaceted truths, and of the relative changeability of it all.
Originally published in January 2016, by Emily van Lidth de Jeude