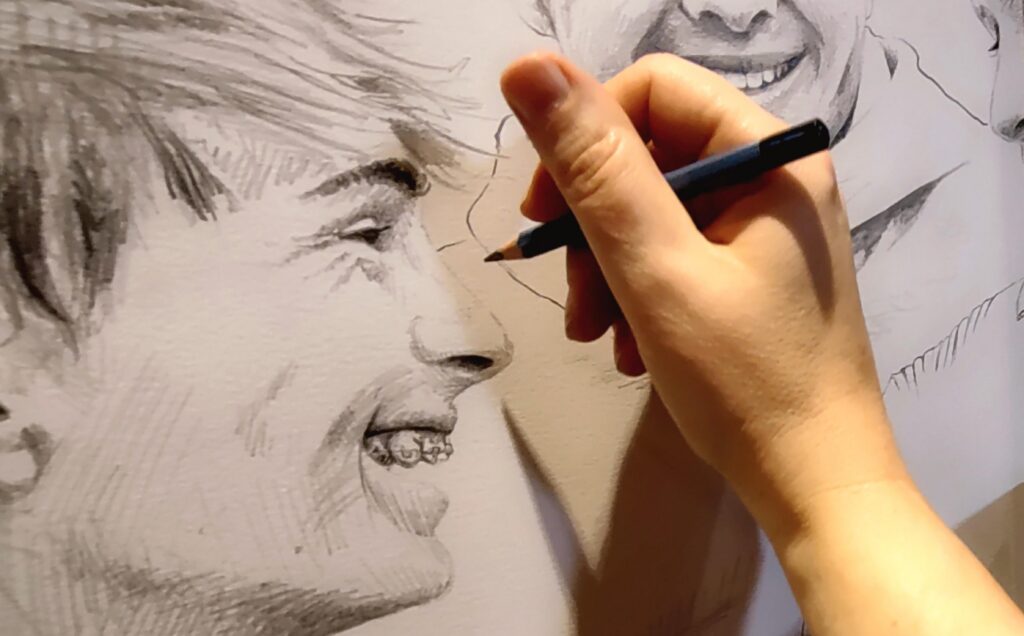
As artists, we have the power, ability, and honour of building our future civilization. Some of us may be doing so intentionally; many not. But whether we're aware of it or not, we are responsible.
Sci-fi is often touted as predicting the future. But does it? Writers and other artists imagine plausible eventualities based on current directions and capabilities… and then they often happen. Maybe the artists are soothsayers, or more likely we're just creative… and humans have evolved by being resourceful. If we're given a wild idea, we take great pleasure in making the seemingly impossible happen. So maybe artists are visionaries. That's not a pat on the back. Most of us want to be seen as visionaries, I suspect, but it's a huge responsibility.
What are we putting out into the world? Books, movies, and other art that may very well have been intended to warn us away from a dystopian future might instead be creating it; putting the ideas for such dystopia into our minds so that our resourceful society will create it. I'm not talking about some evil genius who sits in their dark basement playing apocalypse video games and then thinks, "ooooh I could destroy the world… bwahahahahaaaa!" I'm talking about all of us becoming gradually more and more accustomed to seeing and hearing about such dystopian events so that as they happen, we don't stand up and stop them.
What are artists supposed to do? Become blind Pollyannas and make fluff? Cotton candy dreams with no real plot and no intrigue? No, of course not. Nobody would look, at all. People like to look at what terrifies us. And art needs to deal with our problems, too; not just look the other way. I'm totally not immune to creating work that deals with humanity's pain and failings. But I also feel that we need to be creating work that posits hopeful futures. We need to be imagining the world we want to see, instead of the one we're afraid of.
And luckily, we have nature to look at, for inspiration. Nature is resourceful and opportunistic and ruthless. And extremely beautiful. The whole of nature evolves because of these things, and humans are definitely part of that whole. Nature limits itself simply because it's impossible to keep living if one devours all one's resources at once. I keep an ecosystem-integrated food forest around my home, which teaches me this every year. This year we're having quite an infestation of flea beetles. In previous years it was cabbage moths and one year–spectacularly–it was mourning cloak butterflies. But each of these infestations either destroys it's own habitat and thereby starves itself out, or attracts some kind of predator that eats it alive. Nature limits greed. So, despite my current paltry pea crop, due to the flea beetle infestation, I'll still have food, because my garden is diverse, and next year I don't expect to have such an issue with flea beetles. They've destroyed so many of their resources and attracted so many predators that they can't be such a problem, next year. Humans are in the process of self-limiting, as well, painful though it is for us as individuals.
Contrast my garden flea beetle situation to a garden where all that's planted is peas (because: monocrop=money). The flea beetles now threaten the entire garden, as opposed to just the peas and the odd brassica or tomato, here and there. So now all we see as farmers is the flea beetle problem. And we blast them all to hell with pesticides. Now we have peas, and we make money, but we're poisoning ourselves and the land, and most of the other species that live on it. So in a couple of years of this practice, we've devastated our ability to grow peas, or perhaps anything at all on that piece of land, because we no longer have the diversity of life needed to sustain… life.
It doesn't take much vision to see that that way of farming (or living, or envisioning our human future) is hopeless. It takes a little more vision to imagine and create a hopeful future.
As an artist, I'd like to be one who plants more diversity, in preparation for new ways of living, instead of just imagining bleak futures for us to tumble numbly into. Humanity might indeed extinguish itself by imagining negative futures. But the life of this planet will go on. Yes, it will be utterly changed, because human folly is powerful, and we're destroying life at an ever-increasing rate. But some kind of collection of species (likely including some humans) will carry on beyond our rather short-lived civilization, and will develop its own rich community of life when it settles into the cradle that this planet offers. This new collection of species will imagine itself and grow into what it imagines. And, like my garden, the more diverse this new ecosystem is, the more resilient it will be.
I love to feel the responsibility of such a future. Let's imagine!
In 2023 the CDC released this report, which pertains to data that has since been removed from the CDC’s website, because it referred to what the Trump administration calls “harmful” “gender ideologies.” But here’s the meat of the report. The first statistics are referring to teen girls:
Nearly 1 in 3 (30%) seriously considered attempting suicide—up nearly 60% from a decade ago.
1 in 5 (18%) experienced sexual violence in the past year—up 20% since 2017, when CDC started monitoring this measure.
More than 1 in 10 (14%) had ever been forced to have sex—up 27% since 2019 and the first increase since CDC began monitoring this measure.
The report also found more than half (52%) of LGBQ+ students had recently experienced poor mental health and, concerningly, that more than 1 in 5 (22%) attempted suicide in the past year. Trend data are not available for students who identify as LGBQ+ due to changes in survey methods.
Findings by race and ethnicity also show high and worsening levels of persistent sadness or hopelessness across all racial and ethnic groups; and that reported suicide attempts increased among Black youth and White youth.
***
Let that sink in. What did you think? What did you feel? I am in tears.
My tears are not because I’m a parent of two beautiful newly-fledged children whose safety I fear for every day. They’re not because I’m a woman who knows from personal experience as well as any woman does that the increasing rate of sexual violence still only begins to touch the true horror of our lives as objects. My tears are not even because one of my children is female, and now attends frat parties. My tears are because this damned report says ‘LGBQ+’. My tears are because there is no T.
My tears are because, among the many children I’ve taught and known and loved over the years are a couple handfuls of trans kids, whose stories and hearts and lives matter. Because the rate of depression, suicide, and violence that looks alarming in this CDC report is much higher for trans kids than for anybody else, and it’s not documented, here. My tears are for Marlin, my beautiful trans cousin who struggled with extreme depression and finally killed himself just after Trump was elected, the first time.
And my tears are pointless. Just like hopes and prayers are pointless. All the billions of tears shed for the children we’ve lost will not save all the children we have yet to lose. Our tears are pointless. We have to act.
And what if we don’t know any trans kids? What if our kids are straight, cisgender*, white, wealthy and male? Why should we care? We should care because, in a world where it’s OK to erase people for being trans, it is also OK to erase people for being gay, disabled, non-white, female, or poor. And eventually to erase anyone, for looking different in any small way; for making a mistake or getting sick. And even if our kids are among the privileged few, that world is not a safe place to be. A safe world values everyone. Even the rich. Even trans kids. And besides, we don’t actually know how our kids identify, especially if we haven’t built a world where they feel safe enough to tell us. So what can we do to build this safe world?
My first act after the gut-kick of seeing trans children erased is to write this article. And I will never, ever shut up. I will write more and open my mouth more, and speak up against every ignorant human who tries to tell me they’re saving the children by persecuting trans kids (yeah this isn’t my first walk around the block, in this regard). I will keep wearing the ally pin my kids gave me a couple of years ago, not only because I’m so very proud that they see who I am, but mostly because I know that some frightened child might see the rainbow on my lapel and know that I care; that I will stick up for them, even when they don’t know about it. I wish I had known what Marlin was going through before he died. I wish I’d been able to help him. I wish millions of us had built a safe world for him to grow into, long before he changed his pronouns.
I’ve been asking myself since I was a teenager how I can support LGBTQ+ people in my community. Ever since a boy my age followed my friend and me home, nagging us—either of us—to date him. So I told him we were gay. It was a lie, and half-joking (I had NO idea at that point the severity of what LGBTQ+ people were experiencing.) I thought I could throw him off by making us unavailable to him. His response was, “well that’s a waste of two beautiful girls!” It stuck with me forever. I still think about it. The fact that we were unavailable to men made us a waste. Worthless. That response lit a fire under my butt that has never been extinguished.
It turned out my friend actually was gay, as was my other best friend at the time. And as the years went on, I discovered that more and more of the people I loved were treading the terrifying social swamp of being unavailable to straight cis white men. At around the same time, I found a porno magazine (in the possession of ten-year-old boys) with a photo-rich article about a man converting a lesbian by raping her. That lit another fire. Literally. I stole the magazine and burned it.
And then I had kids. And I had to protect them from the harms leering at them from every corner. And as the number of trans kids we knew grew and grew, and as my own kids educated me about gender and inclusivity, the fire under my butt grew and grew, too. And then we lost Marlin. And now he and every other trans kid I know has been erased. Now the fire is so big I’m a damned rocket. And what are you?
How are you going to protect your kids? How will you make sure they know that if they come home with a new girlfriend or boyfriend or non-binary partner you’ll be delighted, enthusiastic and welcoming? What about if they come home with a new name or pronouns? Will you learn what they know, and follow? Will you stand up for their rights when they decide to start hormone therapy? Will you wear the trans flag when you take them to the doctor?
We adults often think we’ve learned all the stuff. We think it’s up to us to teach the children, but it’s the other way around. We need them to show us how to use our phones, and we need them to teach us about gender and sexuality. Because they know. Yeah. Sexuality. Let go of your pearls. Our kids knew before we taught them the word ‘vagina’. Some of them were raped before that. We need them to teach us what they know, and we need to be open to hearing it. We also need to admit when we’re wrong.
A bunch of years ago, I was walking home with my young teenage daughter, and announced that I was so proud she was non-binary. I was also proud of myself for having recently learned this word.
“Um…” she faltered. “I’m not sure you know what that word means.”
I swallowed. “I thought it means you don’t see or stereotype people for their genders. Like it’s not all black and white. I’m proud that you see the diversity of people.”
“No, Mama.” She corrected me gently. “It means you don’t subscribe to gender binary.”
“Right? That’s sort of what I said, right?”
“No, like personally you don’t subscribe. For your identity. If I was non-binary, I wouldn’t consider myself male or female. I would probably use the pronouns they/them.” She walked on beside me like what she was explaining was just part of everyday knowledge, and I guess to her, it was. “I’m definitely female,” she said. “And Tali is definitely male. Even Marlin was definitely male. But if someone is non-binary they wouldn’t be either one. They’d be non-binary.”
At the mention of Marlin, the conversation became a lot less jovial. I was sorry I hadn’t understood, and I felt very small. Sad. Like suddenly maybe my misunderstanding presented a hazard to my daughter’s safety, even though she is cis. What else did I not understand? But she was forgiving, and understanding of my mistake. “Sorry, Mama,” she said.
“It’s OK.” I swallowed my shame and carried on. “So do you have any non-binary friends?” Out of respect for her friends’ privacy, she couldn’t tell me. And I was proud of that, too.
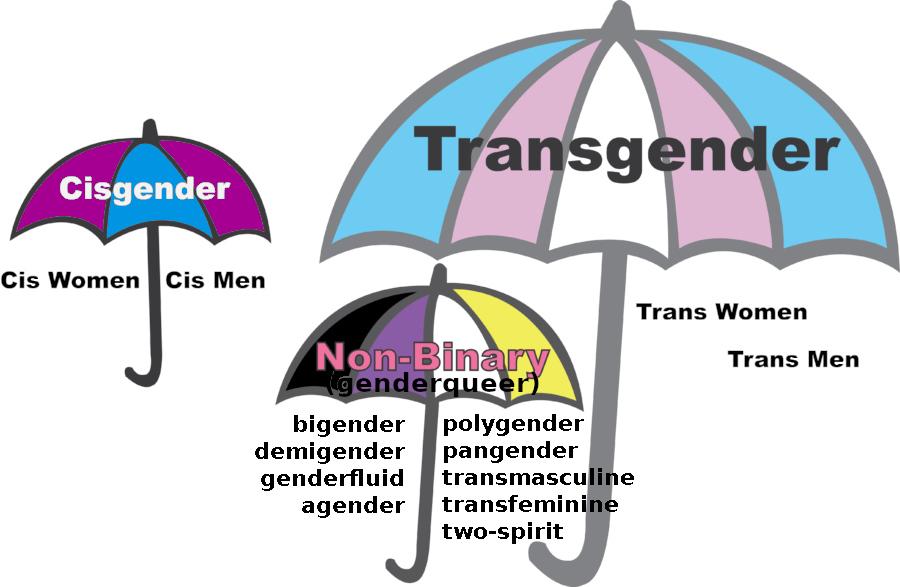
I’ve learned a lot. It turns out non-binary people can also identify as male or female. The gender umbrella is diverse!! And it’s OK to be confused. It’s a great place from which to build curiosity. My kids moved out a few years ago now, and are still my greatest teachers in many ways, especially where culture, inclusivity, and love are concerned.
graphic used and adapted with permission from Gayta Science
Love. Yes, there has to be a fire under our butt. And it has to be fuelled by love. Where the rise of fascism is tearing at the already-shredded fabric of our diverse society, we have to wipe away our tears and start building, with love.
How do we build a safe and inclusive society? We have to swallow our fear and pride and shame and speak up at every opportunity, to wear the colours that show we’re safe adults, to teach other adults what our children teach us, and mostly we have to listen with open arms and open hearts, because many of our children are light-years ahead of us in doing this work. The answer is openness and curiosity.
What I think this all comes down to is that as people with a certain amount of privilege, and sometimes very little understanding of the LGBTQ+ world, we cis parents can still be part of the solution. We can look at the children we love with curiosity and respect. We can amplify their voices and knowledge and build the world they envision. And we can see and support the many safe spaces that empowered LGBTQ+ people are building, already. Because they are powerful. We are powerful. And when our power comes from love, we are all empowered, together.
My cousin Starry, Marlin’s mother, has been a guiding light for me, in my efforts to expand my mind, following the loss of Marlin. When he died, most of us in the family didn’t even know he was ‘he’, or calling himself Marlin. We hadn’t built the kind of safe space in our relationship that he needed to be himself, with us. It was Starry who informed me who he was, despite her pain. Starry, as you might imagine, suffered deeply with the loss of her child. And as the years have gone by, she not only received support in her loss from trans youth, but has also intentionally made herself and her presence a safe space for LGBTQ+ people. She continuously educates herself, and has three trans “foster daughters”, now. Loving others doesn’t only help those we love, it helps us too. Love is always the answer.
So let’s go. It’s Pride season, but it should always be Pride season. Let’s stoke our fires and make sure we’re building and supporting safe spaces, with love.
***
My own children, as well as Marlin’s surviving family members gave their consent to my mentioning of them, in this article. Consent-seeking is part of building safe spaces. I’m grateful for advice and feedback on the article from my own children, and Starry’s friends. Listening and hearing others’ opinions is part of building safe spaces.
Definitions, Links
*The word cisgender (often shortened to cis; sometimes cissexual) describes a person whose gender identity corresponds to their sex assigned at birth, i.e., someone who is not transgender. (Wikipedia: https://en.wikipedia.org/wiki/Cisgender)
A transgender (often shortened to trans) person has a gender identity different from that typically associated with the sex they were assigned at birth. (Wikipedia: https://en.wikipedia.org/wiki/Transgender)
Non-binary or genderqueer gender identities are those that are outside the male/female gender binary. Non-binary identities often fall under the transgender umbrella since non-binary people typically identify with a gender that is different from the sex assigned to them at birth, although some non-binary people do not consider themselves transgender. (Wikipedia: https://en.wikipedia.org/wiki/Non-binary) AKA: gender non-conforming.